Bottom line first: VPS hosting security is not a one-time setup task — it is a continuous discipline. Patch fast, remove what you do not need, restrict access, lock down your firewall, monitor for suspicious changes, and keep tested backups off-server. Do these 10 things consistently, and you cut off the vast majority of attacks that target internet-facing servers every day.
A VPS gives you dedicated resources, root access, and the freedom to configure your server exactly the way you want. That freedom is exactly why VPS hosting security falls squarely on your shoulders. Unlike shared hosting, where the provider locks down most of the stack, a VPS puts you in charge of every security decision.
And attackers know it. Internet-facing servers are scanned within minutes of deployment. SSH ports are hammered by automated bots. Unpatched services are flagged by vulnerability scans that run around the clock. According to research from the University of Maryland, a cyberattack occurs every 39 seconds on average. IBM’s 2025 Cost of a Data Breach report puts the global average breach cost at $4.44 million — down slightly from 2024’s record high, but still devastating for any business.
The good news: VPS hosting security is not magic. It is mostly discipline applied consistently. This guide walks you through 10 essential steps that actually work, aligned with guidance from CISA’s Known Exploited Vulnerabilities catalog, NIST’s Secure Shell guidance, and the CIS Benchmarks for hardened server configuration.
Whether you run a WordPress site, a SaaS application, a client database, or a dev environment on your VPS, the fundamentals are identical. Let us go through them step by step.
What You Will Learn
- Patch Fast — Update the OS, Stack, and Apps
- Strip the Server Down — Remove What You Don’t Need
- Minimize Public Exposure — Close Every Unnecessary Port
- Disable Weak Login Paths — SSH and RDP Hardening
- Enable MFA Everywhere Your Provider Supports It
- Apply Least Privilege — Users, Services, and Databases
- Build a Real Firewall — Deny by Default, Allow by Exception
- Secure the Application Stack — Web Apps, Databases, and TLS
- Monitor and Log — Detection Matters as Much as Prevention
- Back Up Off-Server — Make Recovery Non-Negotiable
VPS Hosting Security Risk Overview: What Attackers Target and Why
Before diving into steps, it helps to understand what attackers are actually looking for on a misconfigured VPS. The Verizon Data Breach Investigations Report consistently identifies credential abuse (22%) and vulnerability exploitation (20%) as the top two initial access vectors in confirmed breaches.
| Attack Vector | What It Targets on a VPS | Primary Defence | Severity |
|---|---|---|---|
| SSH Brute Force | Weak / password-based SSH logins | Key-based auth + Fail2ban | 🔴 Critical |
| Unpatched CVEs | OS, web server, CMS, databases | Weekly patching routine | 🔴 Critical |
| Exposed Admin Panels | phpMyAdmin, cPanel, Webmin on public ports | IP allowlist or VPN gate | 🔴 Critical |
| Misconfigured Firewall | Open ports exposing databases and APIs | Deny-by-default ruleset | 🟠 High |
| Outdated CMS Plugins | WordPress, Joomla, Drupal add-ons | Regular plugin/theme updates | 🟠 High |
| Weak Database Permissions | Globally exposed MySQL/PostgreSQL root | Private bind + per-app DB users | 🟠 High |
| No Backups / Untested Backups | Ransomware, accidental deletion, and hardware failure | Off-server automated backups + restore tests | 🟡 Medium–High |
Step 1: Patch Fast — VPS Hosting Security Starts with Updates
Most VPS compromises have a boring cause. Not a sophisticated zero-day. A boring one: software that had a public fix available for weeks, but nobody applied it. According to cybersecurity data from 2026, 54% of ransomware incidents were traced to outdated or poorly patched systems (CompareCheapSSL). CISA’s Known Exploited Vulnerabilities catalog exists for exactly this reason — attackers weaponize disclosed flaws fast.
Your VPS hosting security patch priority list should cover: the operating system and kernel; web servers such as Nginx or Apache; runtimes such as PHP, Node.js, or Python; databases such as MySQL and PostgreSQL; CMS platforms such as WordPress or Drupal; and control panels such as cPanel or Plesk. Nothing on that list gets a pass.
A practical weekly routine: subscribe to vendor security advisories, review available updates, apply critical patches immediately, and reboot when kernel or core library changes require it. For Linux, unattended-upgrades can handle security-only packages — but review what it applies and test that services come back cleanly after each cycle.
If your VPS runs an end-of-life OS, fix that first. No firewall rule compensates for unmaintained software. As one widely cited 2026 security guide puts it, “security patches should be applied within days, not weeks.”
Step 2: Strip the Server Down — Reduce Your Attack Surface
Every installed service is a potential entry point. Every open port is an invitation. Every extra package is one more thing to patch.
After deployment, audit what is actually installed and listening. Use ss -tulnp or netstat on Linux, or review services and IIS roles on Windows. Then ask: do you need FTP, or just SFTP? Do you need a mail relay on this VPS? Does the database need public access? Is a control panel actually necessary?
Common quick wins for VPS hosting security include removing unused packages, disabling daemons that auto-start on boot, closing ports that serve no production purpose, deleting sample pages and default test apps, and removing unused language modules. Make “listening ports review” a recurring monthly task — new apps and dependencies silently open ports over time.
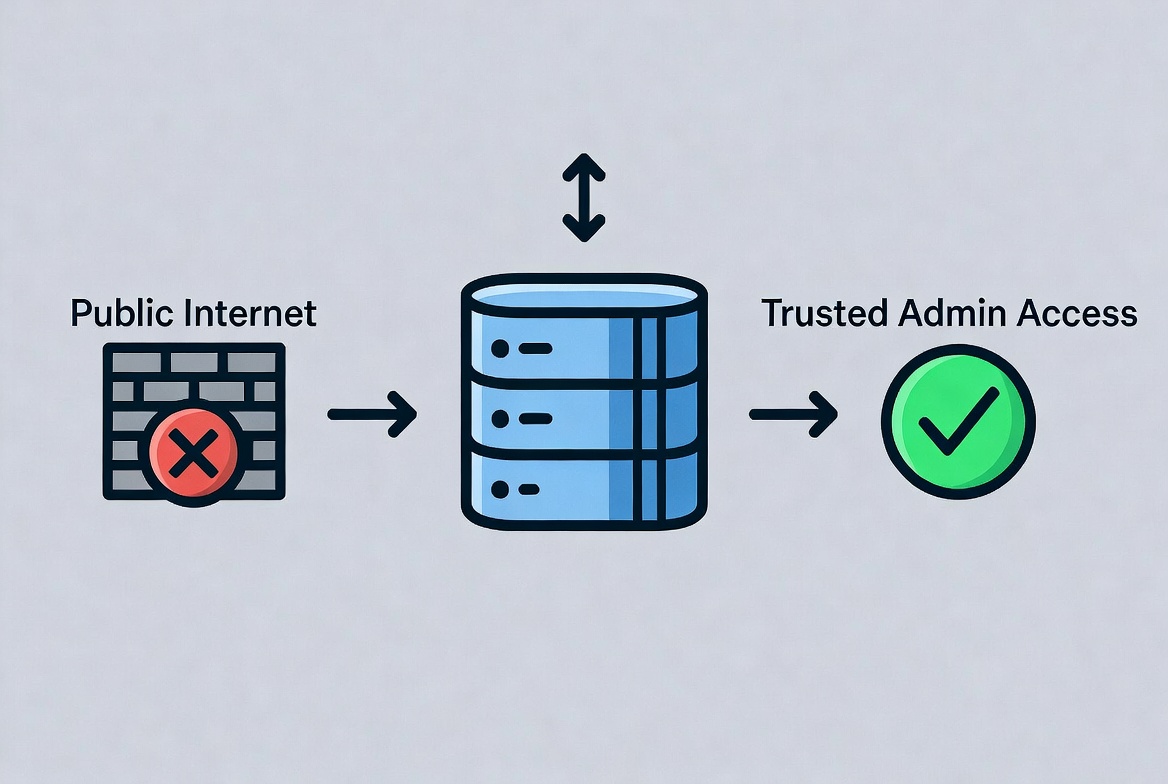
Step 3: Minimize Public Exposure — Keep Admin Services Off the Internet
The safest service is the one that is not reachable from the public internet. That does not mean your website cannot be public — it means admin services should not be.
Restrict SSH to trusted IP addresses where possible. Keep databases on private interfaces only. Put admin dashboards behind a VPN, an identity-aware proxy, or an IP allowlist. Bind internal-only services to 127.0.0.1 or a private network interface.
A common and costly mistake in VPS hosting security: exposing MySQL, Redis, Elasticsearch, or a Docker API publicly “just temporarily.” Attackers love temporary. Within hours of a new server going online, automated scanners will find every open port and probe every service they recognize.
Step 4: Harden SSH and RDP — Lock Down Your Remote Access
If an attacker gets administrative access, the game changes immediately. They do not need a sophisticated exploit if they can simply log in. SSH and RDP hardening is therefore the heart of strong VPS hosting security.
For Linux VPS instances, NIST’s Secure Shell guidance has long favored public-key authentication over password-based authentication. Passwords can be guessed, reused, phished, or brute-forced. SSH keys, managed properly, are far harder to attack at scale. Baseline SSH hardening: disable direct root login, disable password authentication, use ed25519 or RSA 4096 keys, restrict which users can authenticate, and keep OpenSSH fully updated.
For Windows VPS systems, RDP needs the same discipline. Do not expose RDP to the entire internet. Enable Network Level Authentication. Require strong, unique passwords. Prefer MFA-gated and VPN-gated access. Restrict source IPs. Keep Windows and the RDP service fully patched.
Install Fail2ban (Linux) to automatically ban IPs that hit repeated failed login attempts. A basic Fail2ban SSH jail with 5 retries and a 1-hour ban removes most automated brute-force noise immediately.
Step 5: Enable MFA — Essential VPS Hosting Security at Every Level
CISA’s 2025 guidance strongly recommends phishing-resistant multi-factor authentication as a core defensive control. Identity telemetry data shows that modern MFA prevents more than 99% of identity-based attacks. For VPS hosting security, MFA applies at two levels: your hosting provider account and the server itself.
If an attacker compromises your hosting dashboard, they may be able to reset the VPS, attach volumes, view snapshots, rotate credentials, or bypass every server-level protection you have set up. Enable MFA on your hosting provider account, domain registrar, email account used for resets and alerts, control panels, VPN or bastion access systems, and admin dashboards where supported.
App-based TOTP authenticators or hardware security keys (FIDO2/WebAuthn) are significantly stronger than SMS codes. If your provider supports passkeys, use them.
Step 6: Apply Least Privilege — Users, Services, and Databases
Least privilege means every user and every service gets exactly the access it needs and nothing more. In practice for VPS hosting security: separate accounts for separate team members, limited sudo rights where full root is not required, service accounts that access only their own files and processes, and per-application database users instead of one global superuser.
Practical example: create one database user per application and grant only the minimum permissions — read/write on that application’s schema, no global admin, no cross-database access. If that application is compromised, the blast radius stays small.
Also handle secrets properly. SSH private keys should not sit unprotected on shared laptops or in chat attachments. Use passphrases, secure storage, and revocation discipline. If someone leaves your team, remove their SSH keys and revoke their credentials that same day. Keep a simple credential inventory so you know what to rotate after any incident.
Step 7: Build a Real Firewall — Deny by Default for VPS Hosting Security
A firewall does one job: it allows only the traffic you genuinely need and drops everything else. Running a VPS without one is asking for trouble. Even a basic web server should typically expose only ports 80 (HTTP), 443 (HTTPS), and 22 (SSH — ideally IP-restricted). Nothing else needs to be reachable from the public internet.
Use layered filtering: a provider-level or network firewall at the edge, a host firewall on the VPS itself (UFW or firewalld on Linux, Windows Firewall on Windows), and application-level access controls on top. Run an external port scan from a separate network after every configuration change to verify what is actually reachable.
Rate limiting helps prevent abuse. Restrict repeated login attempts on SSH and any login-heavy web apps. For WordPress sites, rate-limit /wp-login.php at the reverse proxy layer and add lockout policies at the application level. Combining host firewall rules with a CDN or reverse proxy also reduces direct exposure of your origin IP.
For a deeper look at which VPS providers include network firewalls, private networking, backups, and DDoS mitigation as standard, see our guide to AI and tech tools that support your infrastructure decisions.
Step 8: Secure the Application Stack — Web Apps, Databases, and TLS
Strong VPS server security at the OS level will not save you from an insecure application. The stack on top needs the same attention.
For web applications: patch frameworks and dependencies, remove unused plugins and themes, disable debug mode in production, restrict admin interfaces, review default configs after installation, and do not leave staging sites publicly accessible. Audit dependencies regularly with tools like Composer, npm audit, or pip-audit.
For databases: do not expose them publicly unless strictly necessary. Disable remote root or superuser access. Use separate database users per application with minimum privileges. Enforce strong, unique credentials. Encrypt connections where the application supports it. Remove default and test databases. Review logs for unusual authentication attempts.
Use HTTPS everywhere it belongs. Keep TLS certificates valid, disable obsolete protocols (SSLv3, TLS 1.0, TLS 1.1), and automate certificate renewal with Let’s Encrypt or your provider’s certificate service. Add certificate-expiration monitoring so you get an alert before a certificate silently expires. File permissions also matter more than people realize — avoid upload directories that execute scripts, and ensure web processes do not run as root.
VPS Hosting Security Maintenance Schedule: Monthly vs Quarterly Tasks

| Security Task | Frequency | Why It Matters | Tool / Method |
|---|---|---|---|
| Apply OS + stack updates | Weekly (critical: immediately) | Closes known CVEs before exploitation | apt / dnf / Windows Update |
| Review open ports externally | Monthly | Catches silent exposure from new apps | nmap / Shodan/provider scan |
| Audit users and SSH keys | Monthly | Removes stale or departed-user access | /etc/passwd + authorized_keys review |
| Review firewall rules | Monthly | Removes rules that should have been temporary | UFW / iptables / provider panel |
| Test backup restores | Monthly | Confirms recovery actually works under pressure | Provider snapshot + off-server restore |
| Check TLS certificates | Monthly | Avoids silent certificate expiry | Certbot / monitoring alert |
| Rotate secrets and credentials | Quarterly (+ after any incident) | Limits blast radius of credential exposure | Credential inventory list |
| External vulnerability scan | Quarterly | Finds what your internal view misses | Lynis / Greenbone / Tenable Nessus |
| MFA status verification | Quarterly | Confirms MFA is enforced on all accounts | Provider account audit + control panel review |
Step 9: Monitor and Log — Detection Is Half of VPS Hosting Security
Prevention matters. So does detection. A VPS with no visibility is a VPS where attackers can operate quietly for weeks. The 2025 IBM report found that breaches involving stolen credentials took an average of 292 days to resolve — partly because no one noticed the unauthorized access.
For VPS hosting security, collect and retain logs for SSH or RDP login attempts, sudo and admin-privilege use, web server access and error logs, application authentication events, firewall blocks, database login failures, control panel logins, and service restarts. Forward logs to a separate destination whenever possible, so that an attacker cannot erase evidence by accessing the server.
Set up alerts for: repeated failed login attempts, unexpected CPU or outbound traffic spikes, new listening ports, unexpected file changes in web roots, new user accounts or SSH keys added, and unplanned reboots. Baseline your normal outbound traffic to spot crypto-mining or spam relaying early.
File integrity monitoring (Tripwire, AIDE, or similar) and malware scanning are worth adding, depending on your stack and risk level. For WordPress specifically, periodically scan upload directories for unexpected PHP files and check for modified core files. If a server shows clear signs of compromise, rebuilding from a known-clean image is often the safer and faster path over attempting in-place cleanup.
Step 10: Back Up Off-Server — Make Recovery Part of VPS Hosting Security
The final pillar of VPS hosting security is recovery. If something goes wrong — ransomware, accidental deletion, hardware failure, a botched update — you need to get back online fast without losing data.
A solid backup approach includes: automated daily backups, off-server copies (and ideally off-provider), encryption at rest and in transit, clear retention policies, documented restore procedures, and regular restore tests. Back up databases, uploaded content, critical configuration files, and anything else not fully reproducible from version control.
Provider snapshots are useful for quick rollbacks but are not a complete backup strategy. If your provider experiences an outage or your account is compromised, snapshots stored in the same environment are at risk. Keep at least one independent copy with a separate provider or storage service.
Test restores, not just backup jobs. Verify that a database dump actually restores cleanly, that file permissions survive the restore process, and that your recovery time aligns with what your business can actually tolerate.
Rotate all credentials after any incident or suspected compromise: SSH keys, passwords, database credentials, API keys, SMTP keys, control panel passwords, and provider account tokens.
Key Takeaway: VPS Hosting Security Is Discipline, Not Magic
Strong VPS hosting security does not come from buying the most expensive security tool or running the longest checklist. It comes from fundamentals applied consistently: patch quickly, strip the server down, restrict access, use keys and MFA, enforce a real firewall, secure the application stack, monitor for suspicious changes, back up off-server, and test recovery regularly.
Attackers are automated and persistent. Defending your VPS means making their job harder every day — not just on launch day. Run your monthly maintenance, schedule your quarterly audits, and make recovery non-negotiable.
For more AI and tech tools that support smarter infrastructure management, visit our resource hub and explore the latest AI tech news and automation trends from AI Key for Riches.
Explore More Website and Hosting Security Tools
Frequently Asked Questions: VPS Hosting Security
What is VPS hosting security, and why does it matter?
VPS hosting security is the set of practices that protect your virtual private server from unauthorized access, data loss, and downtime. Unlike shared hosting, where the provider manages most security settings, a VPS gives you root access and full responsibility for security. Without deliberate security measures, automated bots can compromise a new server within hours of deployment.
Is a VPS more secure than shared hosting?
A VPS offers better isolation and more control than shared hosting, which can make it more secure — but only if you manage it properly. Shared hosting providers lock down most settings by default. On a VPS, you control updates, firewall rules, user accounts, and application configurations. If those are neglected, a VPS can actually be less secure than managed shared hosting.
Should I disable password-based SSH login on my VPS?
Yes, if at all possible. Key-based SSH authentication is far harder to brute-force than password login. Combine it with restricted login users, optional IP allowlisting or VPN-gated access, and Fail2ban to block repeat failures. Password-based SSH is one of the most common initial access vectors on internet-facing servers.
Do I need a firewall if my VPS only runs a website?
Yes, absolutely. Even a simple web server should expose only ports 80 and 443 to the public internet. Administrative ports like SSH (22) or RDP (3389) should be restricted to specific IP addresses or accessible only through a VPN or bastion host. A deny-by-default firewall is a baseline security requirement for VPS hosting, not an optional extra.
What are the most common VPS hosting security mistakes?
The most common mistakes are: delayed patching that leaves known CVEs open, exposing admin panels and databases to the public internet, leaving SSH password authentication enabled, running outdated CMS plugins or themes, granting overly broad permissions to application users and databases, and keeping backups that are untested or stored on the same server being backed up.
How often should I review my VPS security?
Apply critical patches immediately upon the disclosure of actively exploited vulnerabilities. Run weekly update checks and apply available security updates as a minimum routine. Schedule monthly reviews of open ports, user accounts, SSH keys, firewall rules, backup status, and logs. Conduct deeper quarterly audits covering permissions, MFA status, secret rotation, and external vulnerability scanning.
Are provider snapshots enough for VPS backup and recovery?
No. Snapshots help with quick rollbacks but are not a complete backup strategy. They are stored in the same provider environment, which means a provider outage, ransomware attack, or account compromise could affect them. For reliable VPS hosting security, keep versioned backups off-server — and ideally off-provider — encrypt them, and test restores regularly.
What should I do if my VPS is compromised?
Isolate the server immediately by removing public network access if possible. Preserve logs and take a forensic snapshot before making changes. Notify anyone whose data may be affected. Rotate all credentials — SSH keys, passwords, database credentials, API keys, and provider tokens. Restore from a known-clean backup rather than attempting in-place cleanup. Then conduct a post-incident review to close whatever gap was exploited.